Tag Archives: x86

Compiling the Android emulator kernel – the easy way

I have recently posted a series on how to build your Android kernel emulator for arm, x86 and mips. You can do this manually to have full control or you can use a script Google provides in external/qemu/distrib/build-kernel.sh.

First you need to download the goldfish kernel and check out the 2.6.29 branch:

$ git clone https://android.googlesource.com/kernel/goldfish.git
$ cd goldfish
$ git checkout -b 2.6.29 origin/android-goldfish-2.6.29

The Android source tree has a script to compile the kernel in external/qemu/distrib/build-kernel.sh. You need to be in the root of the kernel directory and set the architecture you want to build for.

For arm:

$ ${ANDROID_BUILD_TOP}/external/qemu/distrib/build-kernel.sh --arch=arm

For x86:

$ ${ANDROID_BUILD_TOP}/external/qemu/distrib/build-kernel.sh --arch=x86

For mips:

$ ${ANDROID_BUILD_TOP}/external/qemu/distrib/build-kernel.sh --arch=mips

This will build the kernel in the kernel directory. You can access the zImage/bzImage and vmlinux images as usual from the kernel directory or from the /tmp/kernel-qemu directory. You can start the emulator using one of these images.

For more details you can check the posts on how to build the emulator for arm, x86 or mips.

Build your own NDK from the Android source tree

Let’s say you want to port a Linux tool to Android. You got the latest NDK and you tried building the Linux tool you want to port. You tool does not build because it depends on the latest bionic changes that did not make it into the latest NDK release. What can you do? Build your own NDK from Google’s source tree that will contain the latest bionic changes.

Prerequisites

If you haven’t done this already, you need to download the latest Google tree and compile it.

Build the NDK

You need to run the NDK script that builds sysroot. sysroot is the directory that will contain the libraries and header files for your target. You need to specify the ABI you want for the target.
For x86 you need to run:
$ ./ndk/build/tools/build-ndk-sysroot.sh --abi=x86
and for arm:
$ ./ndk/build/tools/build-ndk-sysroot.sh --abi=arm

Use the new NDK sysroot

If you want to cross compile any C application, you’ll need to use the new sysroot for NDK.
For x86:
$ export NDK_SYSROOT=${ANDROID_BUILD_TOP}/ndk/build/platforms/android-3/arch-x86
For arm:
$ export NDK_SYSROOT=${ANDROID_BUILD_TOP}/ndk/build/platforms/android-3/arch-arm

For details on how to cross compile a C application see Cross-compiling a C application using the Android NDK.

Cross-compiling a C application using the Android NDK

If you want to port any Linux tool to Android you will first need to use the Android environment to built it. You can do this in the Android source tree or you can use the Android NDK. Adding your tool to the source tree means you have to convert all Makefiles to Android.mk files – which is not an easy thing to do. It is much easier to download the NDK and use the Android toolchain, header files and libraries.

1. Download the NDK

You can download the NDK from Google’s site. You just need to extract the archive and that’s it! You got the NDK.
You need to set a variable to the path you installed NDK to:

$ export NDK=~/usr/android-ndk-r8b

2. Set environment variables

You need to set 2 environment variables for cross-compiling: one for the toolchain and the other for the header files and libraries.

Set cross-compiler for x86

$ export NDK_TOOLCHAIN=${NDK}/toolchains/x86-4.6/prebuilt/linux-x86/bin/i686-linux-android-
$ export NDK_SYSROOT=${NDK}/platforms/android-9/arch-x86

Set cross-compiler for arm

$ export NDK_TOOLCHAIN=${NDK}/toolchains/arm-linux-androideabi-4.6/prebuilt/linux-x86/bin/arm-linux-androideabi-
$ export NDK_SYSROOT=${NDK}/platforms/android-9/arch-arm

Compile!

Let’s create hello-world.c:

#include <stdio.h>

int main(void)
{
    printf("Hello world cross compiled on Android!\n");
    return 0;
}

In order to compile it for Android we need to set CC and CFLAGS. CC will point to the cross-compiler from the NDK toolchain. CFLAGS will set sysroot to point to the NDK directory that has the header files and libraries.

$ make CC=${NDK_TOOLCHAIN}gcc CFLAGS=--sysroot=${NDK_SYSROOT} hello-world

Test it in the emulator

You can easily test this in the emulator. For instructions on how to set up the emulator see How to build a custom Android emulator image.

$ adb push hello-world /data/
$ adb shell
# /data/hello-world
Hello world cross compiled on Android!

Get the brand new 3.4 Android kernel working for the x86 emulator

New kernel means new features. The stable emulator kernel is 2.6.29 which is pretty old. 3.4 is not the latest Linux kernel either, but it’s the latest we’ve got for Android. This is not yet working directly from Google’s source code, so you’ll need to do some extra things if you want to use it.

Download the sources for the 3.4 kernel

If you haven’t already done this, you need to download the goldfish kernel sources and checkout the 3.4 branch:

$ git clone https://android.googlesource.com/kernel/goldfish.git
$ cd goldfish
$ git checkout -b 3.4 origin/android-goldfish-3.4

Where is goldfish_defconfig?

Not in Google’s code. Code is missing from this branch and is not yet ready to use:

$ make goldfish_defconfig
  HOSTCC  scripts/basic/fixdep
  HOSTCC  scripts/kconfig/conf.o
  SHIPPED scripts/kconfig/zconf.tab.c
  SHIPPED scripts/kconfig/zconf.lex.c
  SHIPPED scripts/kconfig/zconf.hash.c
  HOSTCC  scripts/kconfig/zconf.tab.o
  HOSTLD  scripts/kconfig/conf
***
*** Can't find default configuration "arch/x86/configs/goldfish_defconfig"!
***
make[1]: *** [goldfish_defconfig] Error 1
make: *** [goldfish_defconfig] Error 2

We can check Google’s Gerrit for new patches not yet merged.
Searching for status:open project:kernel/goldfish branch:android-goldfish-3.4 we get a lot of new patches: https://android-review.googlesource.com/#/q/status:open+project:kernel/goldfish+branch:android-goldfish-3.4,n,z.

Patch the kernel

The latest patch in the series is https://android-review.googlesource.com/#/c/40433/
You need to use git pull on the latest patch so you get all dependencies as well:

$ git pull https://android.googlesource.com/kernel/goldfish refs/changes/33/40433/2

As the latest patch says, this will make the emulator work for x86 but not for arm.

Compile the kernel

Just as a reminder, these are the steps to compile it:

$ export CROSS_COMPILE=${ANDROID_BUILD_TOP}/external/qemu/distrib/kernel-toolchain/android-kernel-toolchain-
$ export REAL_CROSS_COMPILE=${ANDROID_BUILD_TOP}/prebuilts/gcc/linux-x86/x86/i686-linux-android-4.6/bin/i686-linux-android-
$ export ARCH=x86
$ export SUBARCH=x86
$ make goldfish_defconfig
$ make

Run the emulator with the new kernel

Start the emulator with the newly compiled kernel:

$ cd ${ANDROID_BUILD_TOP}
$ emulator -kernel ~/workspace/android/goldfish/arch/x86/boot/bzImage -wipe-data &

Connect with adb to the running emulator and check the kernel version:

$ adb shell cat /proc/version
Linux version 3.4.0+ (yaap@yaap-desk) (gcc version 4.6 20120106 (prerelease) (GCC) ) #2 PREEMPT Sun Sep 23 14:41:45 EEST 2012

How to compile the kernel for the x86 emulator

If you want to compile the x86 kernel for the emulator, you first need to read Google’s instructions on how to compile the kernel. Just by following these instructions you will not be able to successfully build the kernel because you will run into a few issues.

Google’s instructions

First you need to download the Android emulator kernel sources. The stable branch is 2.6.39 so this is what we are going to use.

$ git clone https://android.googlesource.com/kernel/goldfish.git
$ cd goldfish
$ git checkout -b 2.6.29 origin/android-goldfish-2.6.29

Google’s site only has instructions for arm, but you can easily adapt them to x86:

$ export CROSS_COMPILE=${ANDROID_BUILD_TOP}/prebuilts/gcc/linux-x86/x86/i686-linux-android-4.6/bin/i686-linux-android-
$ export ARCH=x86
$ export SUBARCH=x86
$ make goldfish_defconfig
$ make

${ANDROID_BUILD_TOP} should point to the top of your Google Android tree. It should be set automatically if you have the Google environment set. In order to do that you need to run source build/envsetup.sh and lunch full_x86-eng.

First problem: you need to set your cross-compiler properly

If you will follow the steps mentioned above, you get the following error:

warning: SSE instruction set disabled, using 387 arithmetics [enabled by default]

The solution is to set the cross compiler as mentioned below:

$ export CROSS_COMPILE=${ANDROID_BUILD_TOP}/external/qemu/distrib/kernel-toolchain/android-kernel-toolchain-
$ export REAL_CROSS_COMPILE=${ANDROID_BUILD_TOP}/prebuilts/gcc/linux-x86/x86/i686-linux-android-4.6/bin/i686-linux-android-

As an alternative, you can use the build-kernel.sh script to compile the kernel:

$ ${ANDROID_BUILD_TOP}/external/qemu/distrib/build-kernel.sh --arch=x86

Second problem: you need a workaround for the GCC 4.6 toolchain

After solving the first problem, you will still get a build error:

i686-linux-android-gcc: error: elf_i386: No such file or directory

This is a bug in the GCC 4.6 toolchain.
A fast workaround is to change arch/x86/vdso/Makefile by replacing -m elf_i386 with -m32 and -m elf_x86_64 with -m64.

$ sed -i "s/-m elf_i386/-m32/g" arch/x86/vdso/Makefile
$ sed -i "s/-m elf_x86_64/-m64/g" arch/x86/vdso/Makefile

How to build a custom Android emulator image

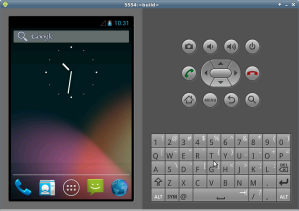
Android emulator
If you want to play with Android and do not have any hardware device, your best option is to use the emulator. Depending on the degree of changes you want to make in the source code, you have several options. You can just download the emulator and run it or compile it from the Google source code. Since the source code comes with a pre-compiled kernel you will need to get the kernel separately and build it if you want to make changes there.

Run the Android emulator

The Android Emulator can be downloaded with the Android SDK. Google has detailed and up to date information on their developer site on how to this.

You first need to create an AVD configuration. Then you can run the emulator using:

$ emulator -avd my_avd

Build the Android emulator from source

First thing you need to do is to download the Android source tree from Google. If you do not need a specific version, it is best to download the master branch to get all the latest changes and fixes. In a nutshell, this is what you have to do:

$ mkdir ~/bin
$ PATH=~/bin:$PATH
$ curl https://dl-ssl.google.com/dl/googlesource/git-repo/repo > ~/bin/repo
$ chmod a+x ~/bin/repo
$ mkdir -p ~/workspace/android/google
$ cd ~/workspace/android/google
$ repo init -u https://android.googlesource.com/platform/manifest
$ repo sync

Next you need to build the emulator. You can build the emulator for arm or x86. Since the arm emulator will run quite slow on you machine, it is best to build the x86 emulator.

Build the x86 emulator

$ source build/envsetup.sh
$ lunch full_x86-eng
$ make -j4

Now you can go get some tea or coffee cause this will take a while depending on the machine you’re building on. You can improve the build time by using ccache.

When the building finishes, run the emulator:

$ emulator -wipe-data &

You can specify various parameters to the emulator. By -wipe-data you reset the user data image. It is not necessary to use this parameter every time, but I find it a good practice to do so. I sometimes have problems with the emulator not starting and using -wipe-data fixes this.

Build the arm emulator

If for some reason you need to build the emulator for arm here are the steps:

$ source build/envsetup.sh
$ lunch full-eng
$ make -j4
$ emulator -wipe-data &

Build the emulator kernel from source

Now you have the emulator running and you also have the source tree. You can tweak any part of the code, recompile and test your changes in the emulator. What happens if you need to change the kernel config? Maybe you want to try out some kernel debugging options and these are not enabled in the prebuilt kernel image (true story – it happened to me).
You need to download and build the kernel for Android separately.

The kernel for the emulator is the goldfish kernel. You can download it using:

$ cd ~/workspace/android
$ git clone https://android.googlesource.com/kernel/goldfish.git
$ cd goldfish

You may notice that you do not have any files in this directory after git clone. This happens because the master branch does not contain any code. You need to checkout a specific branch for the kernel. To check what branches are available you use git branch -a:

$ git branch -a
* master
remotes/origin/HEAD -> origin/master
remotes/origin/android-goldfish-2.6.29
remotes/origin/android-goldfish-3.4
remotes/origin/linux-goldfish-3.0-wip
remotes/origin/master

The stable and working branch is 2.6.29. You need to checkout this branch:

$ git checkout -b 2.6.29 origin/android-goldfish-2.6.29

Now you have the source code and you can start building the kernel.

Build the kernel for the x86 emulator

Before you start building your kernel, you need to set the cross-compiler path. Since you already downloaded the source tree you have the toolchain there.

$ export CROSS_COMPILE=${ANDROID_BUILD_TOP}/external/qemu/distrib/kernel-toolchain/android-kernel-toolchain-
$ export REAL_CROSS_COMPILE=${ANDROID_BUILD_TOP}/prebuilts/gcc/linux-x86/x86/i686-linux-android-4.6/bin/i686-linux-android-

${ANDROID_BUILD_TOP} should point to the top of your Google Android tree. It should be set automatically if you have the Google environment set. In order to do that you need to run source build/envsetup.sh and lunch full_x86-eng.

Next you need to set the architecture, configure and build the kernel:

$ export ARCH=x86
$ export SUBARCH=x86
$ make goldfish_defconfig
$ make

In order to start the emulator using the newly compiled kernel you must use the -kernel option:

$ cd ${ANDROID_BUILD_TOP}
$ emulator -kernel ~/workspace/android/goldfish/arch/x86/boot/bzImage -wipe-data &

Build the kernel for arm emulator

If you need to build for arm, this is what you have to do:

$ export CROSS_COMPILE=${ANDROID_BUILD_TOP}/prebuilts/gcc/linux-x86/arm/arm-linux-androideabi-4.6/bin/arm-linux-androideabi-
$ export ARCH=arm
$ export SUBARCH=arm
$ make goldfish_armv7_defconfig
$ make
$ cd ${ANDROID_BUILD_TOP}
$ emulator -kernel ~/workspace/android/goldfish/arch/arm/boot/zImage -wipe-data &

You may try to use make goldfish_defconfig insteaf of goldfish_armv7_defconfig. Currently the kernel built with goldfish_defconfig does not boot.